First of all--what is it and why should you care? Well, it's a great little tool that lets you choose a part of your screen that you want to save--like instead of having to do a whole screenshot and then crop that to get the part that you want, you can just choose the part of your screen that you would like and then save it as an image (it saves as a .png file, if you care to know that detail).
For example, if you just want part of a scene or webpage, you could take a screenshot and then move it into paint or some other photo editing software and crop it and save it. OR you can use your snipping tool to just "screenshot" the segment you choose.
Say you would like to save the pic of the first paragraph of this team's webpage (indicated by the large red arrow). You could either screenshot it and then crop it, or you could snip just what you want!
 |
| screenshot captures the entire screen face of your laptop |
 |
| with the snipping tool you can save just the bit you want |
So how do you get this wonderful tool? Well, it's probably already on your computer, you just might not know about it!
Go to your search bar and type in snip. This should give you the option of "snipping tool" app. You could just open it and use it, but I'd recommend choosing "pin to taskbar" , so that it will be available whenever you need it!
By pinning it to the taskbar, it will be located on the bottom of your screen (see the red arrow below)
When you want to use it, just click on that icon and a window that looks like this will appear:
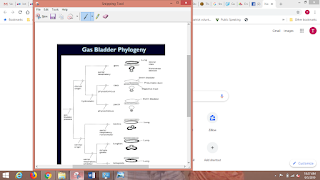
Click on "New" and that will give your cursor an expanding rectangle that you can drag till it's around the item you want to screenshot. When you release the mouseclick, it'll show you the snip it's taken:
 |
| you can see the snip you've made |
So for example, that snip just above, when I saved it and re-open it, this is what will appear:
Just what I chose!
SO--there's my tip for the day! Pin that tool to your taskbar and you'll find that it is a hugely valuable tool! Give it a try! :)


My husband introduced me to this tool a couple of years ago and it is so handy!!
ReplyDeleteI don't remember how I found the snip tool but I use it a lot! I wish I'd had your tutorial to help me figure it out though. ;-)
ReplyDeleteThe snipping tool is called something else now (at least on my computer) Snip and Sketch. VERY VERY helpful! :)
ReplyDelete